In early 2012, Olympus took its Micro Four Thirds lineup into new territory with the E-M5, which reinvented the company's OM film camera brand as an enthusiast and pro-friendly mirrorless camera for the digital age. The followup E-M1 took over the reins as Olympus' pro-friendly flagship some 18 months later, with the E-M5 remaining in the lineup as the enthusiast's go-to choice, offering plenty of creative possibilities and room to grow as a photographer, but with a very affordable pricetag.
Now, three years later, the Olympus E-M5 II arrives, taking the E-M5 series back to the forefront with advancements including an uprated, record-making five-stop image stabilization system and a versatile tilt/swivel LCD -- the latter a particularly impressive feat in a dust and splash-proof body. Not that the stabilization system isn't spectacular too. Olympus claims shutter speeds as long as 1/4-second will now be hand-holdable.
The Olympus E-M5 II is based around the same, more powerful image processor used in the E-M1, and the manufacturer-claimed 10 frames-per-second burst rate of the new model is indeed a little up from that of the original camera's 9 fps spec, albeit not quite as fast as that of the E-M1 with continuous autofocus active (5.0 vs 6.5 fps). (Likely, that difference is due to the lack of on-chip phase detection AF pixels in the E-M5 II, something that the E-M1 does feature. The E-M5 does offer more than twice as many AF areas as its predecessor, though, with an 81-area array.)
The already-generous array of controls found on the original E-M5 have been supplemented with several new ones. The existing controls, too, have been reworked for better handling, and the electronic viewfinder has gotten a big boost in resolution and magnification to match that of the E-M1.
Video shooters in particular will be thrilled with some of the changes made in the Olympus E-M5 II. Although the image stabilization system doesn't offer the full five-stop corrective range for video, it's nonetheless impressively steady, and comes coupled with refined exposure and contrast-detection autofocus algorithms tuned specifically for video capture. The result: smoother focus adjustments with barely any perceptible hunting around the point of focus, and a quick reaction to sudden changes in ambient light levels.
The E-M5 II also provides the ability to choose inter or intra-frame compression with up to 77Mbps bit-rates, and to shoot at up to 60 progressive-scan frames per second. And if you want even more control, uncompressed HDMI output is also possible, as is support for timecode. Also new are built-in microphone and headphone jacks -- the latter not in the camera itself, but in the optional HLD-8G accessory grip. No doubt about it: the E-M5 II looks to offer a big step forward over both the E-M5 and E-M1 in the video department.
Video fans don't get all the love, though! Still photographers, too, have a nice surprise in store. While the sensor resolution of 16 megapixels is unchanged, the E-M5 II can now shoot in a clever resolution-enhancing mode which produces 40-megapixel (39.9MP) JPEGs or 64-megapixel (63.7MP) raw files! How does it do this? Simply put, it takes eight shots in quick succession, with the sensor position adjusted just half a pixel's distance between each shot. All eight frames are then combined into a single image with greatly increased resolution, the catch being that this trick won't work with moving subjects and a tripod is recommended. A free plug-in for Photoshop CS4 or newer will let you open the 64-megapixel raw files.
And there are plenty more feature tweaks throughout, including some more -- such as built-in Wi-Fi wireless networking connectivity, a 1/8,000 second high-speed mechanical shutter (up to 1/16,000s in Silent Mode with a fully-electronic shutter), tethered shooting support and focus peaking -- inherited from the E-M1. Others, like a new high-gain live view mode intended for shooting stars, are brand new for this camera. Yet despite all the improvements, the Olympus E-M5 II is slated to cost quite a bit less than did its predecessor at launch just three years ago.
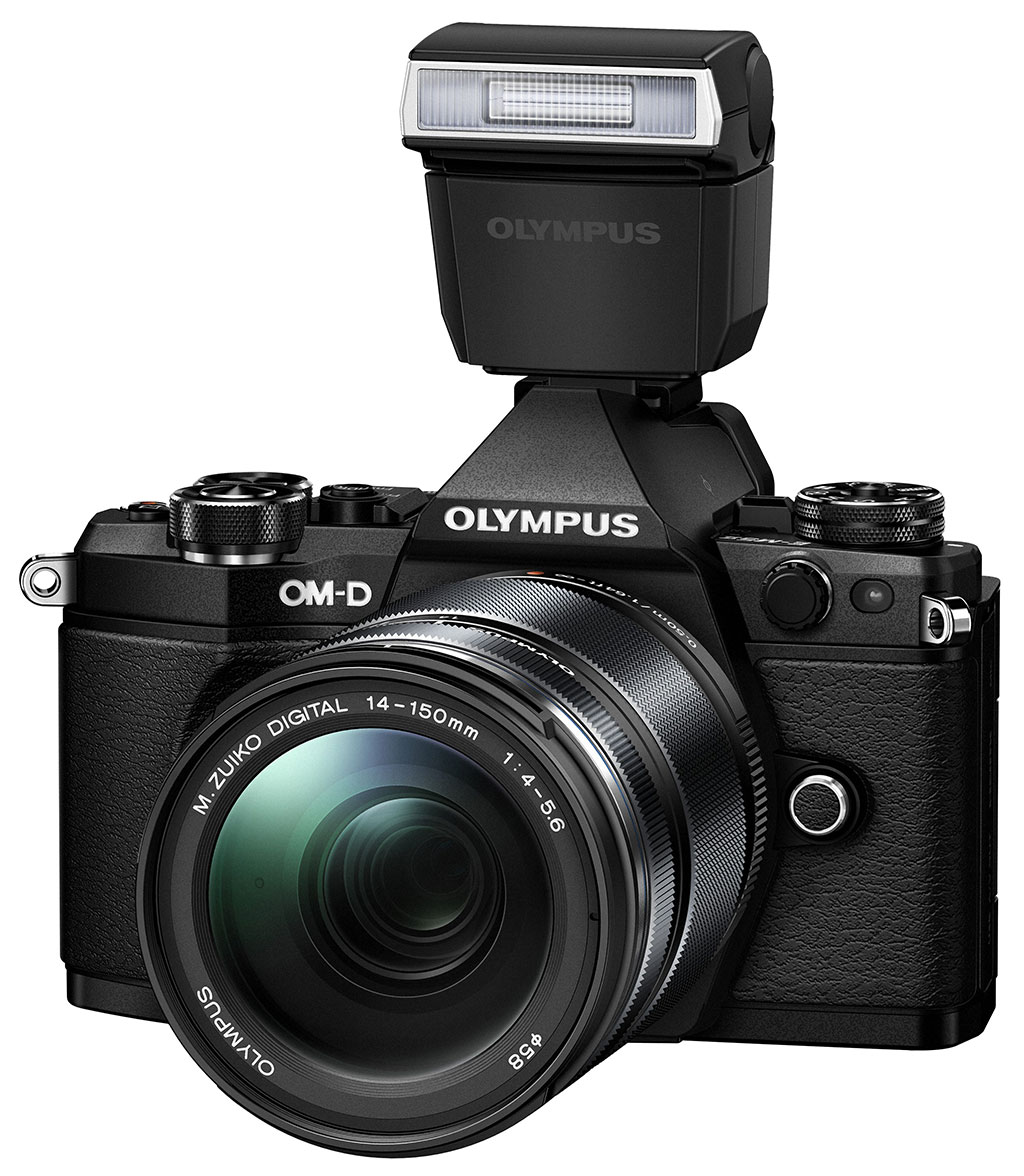
With an expected body-only list price of US$1,100 or thereabouts, the Olympus E-M5 II should hit retail from around mid-February in the US market. That's US$200 less than the original list price of the E-M5, and US$300 below the E-M1. Two body colors will be available: either black or silver. Included in the price is a bundled FL-LM3 tilt/swivel flash strobe with a guide number of nine meters at ISO 100.
Let's take a closer look around the Olympus E-M5 II body, and see what's new!
Olympus E-M5 II Walkaround
|
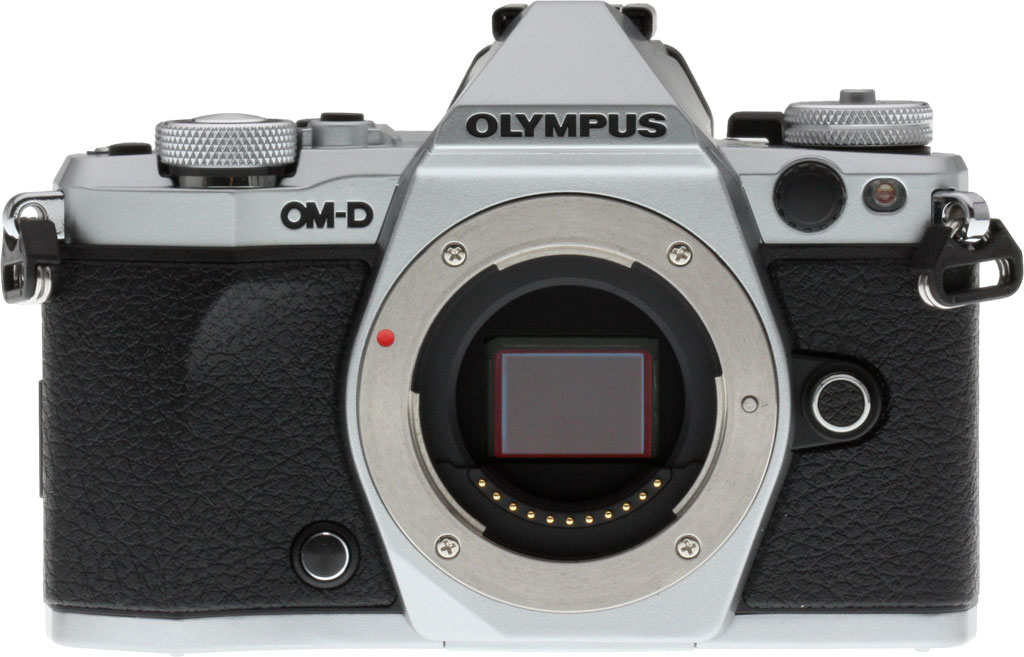
Seen from the front, the Olympus E-M5 II looks quite a bit like its predecessor, but there's actually quite a few differences beyond that first glance. For one thing, the top of the hand grip now has a curve towards the lens mount to give your fingers some extra purchase. (By contrast, the E-M5 grip ran vertically for the full height of the camera.)
The AF assist lamp and lens mount release button have also been joined by a couple of new features. Below and just right of the lens mount (as seen from the rear) is a new programmable button that defaults to depth-of-field preview, while just inside of the AF assist lamp is a flash sync terminal, a new addition inherited from the E-M1.
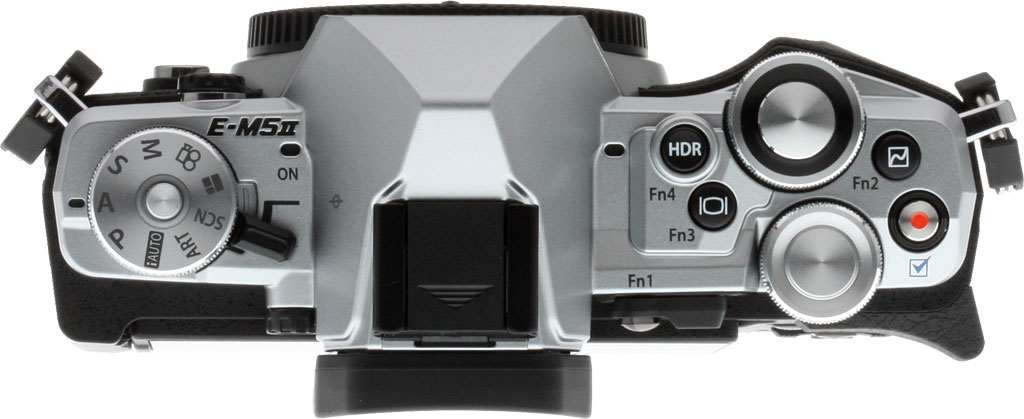 |
Of course, you could also see the redesigned top-deck controls from in front of the camera, but looking at the top of the E-M5 II makes the changes more obvious.
Perhaps most significantly, the Mode dial now has a central locking button, and sits above the relocated power switch. Jump across the electronic viewfinder hump, and you'll find two additional buttons, both of which can also serve as configurable function buttons. By default, the Function 3 button changes display, something previously achieved with a button on the right side of the viewfinder hump. The new Function 4 button, meanwhile, accesses high dynamic range mode.
To make way for these additions, the rear dial has been moved closer to the right of the camera body, making it a bit easier to reach in the process.
 |
Moving to the rear of the camera, the most obvious change is the Olympus E-M5 II's new side-mounted, tilt/swivel display articulation mechanism. The original E-M5 had a simpler tilting mechanism that we find much less versatile. By contrast, the E-M5 II's display will cover a much greater range of shooting angles -- including selfies -- and can also be closed with the display facing inwards for an extra modicum of protection against minor knocks and scrapes.
The Function1 button, visible just right of the electronic viewfinder, is now surrounded by a switch that allows it to serve multiple functions, just as in the E-M1. And with the Power switch now relocated to the top deck, its location at bottom right is taken over by the rehomed Playback button. Curiously, the speaker grille previously found on the left side of the body now sits inside the thumbgrip, a location that makes it fairly easily-covered when shooting, though this may come in handy for quickly muffling the sound without having to mute the camera.
One last change of note is actually a feature omission: The E-M5 II no longer sports the proprietary Accessory Port that was found beneath the flash hot shoe on the earlier E-M5 and E-M1, meaning that these accessories can no longer be used with the E-M5 II. (But then, with Wi-Fi wireless networking, a high-res viewfinder and an external microphone jack all built in, there's little need for these accessories on the E-M5 II.) You can't see it in any of our current product shots, but there's an extra contact in the E-M5 Mark II's hot shoe to power the new bundled FL-LM3 flash.
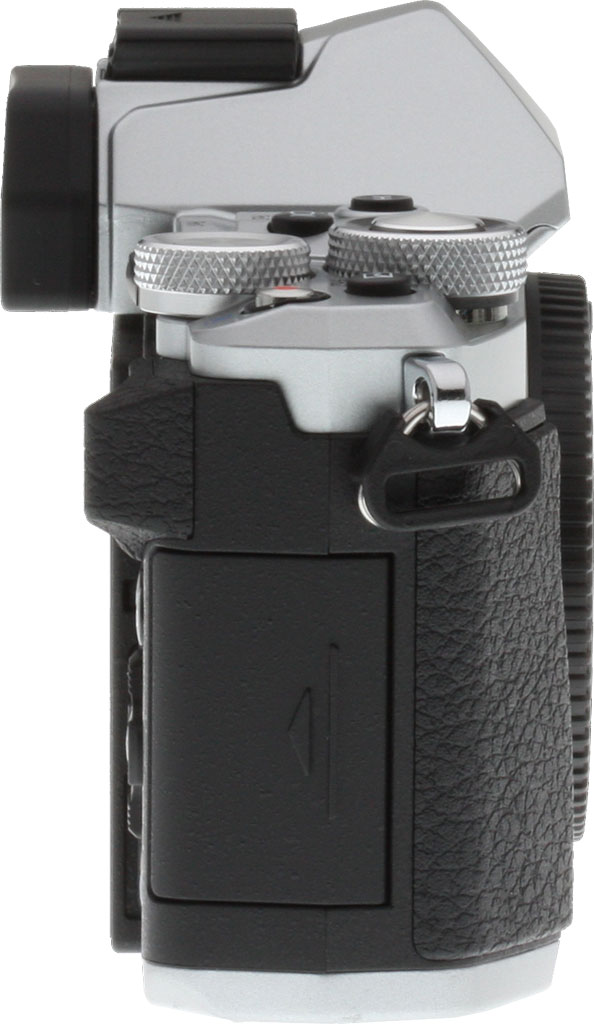 |
Moving to the right side of the camera body, the Olympus E-M5 II looks much like its predecessor. The most obvious differences are the slightly reprofiled handgrip, and the absence of the display button on the side of the viewfinder hump. The right strap lug has also moved a little further forward on the camera for better balance with a lens attached.
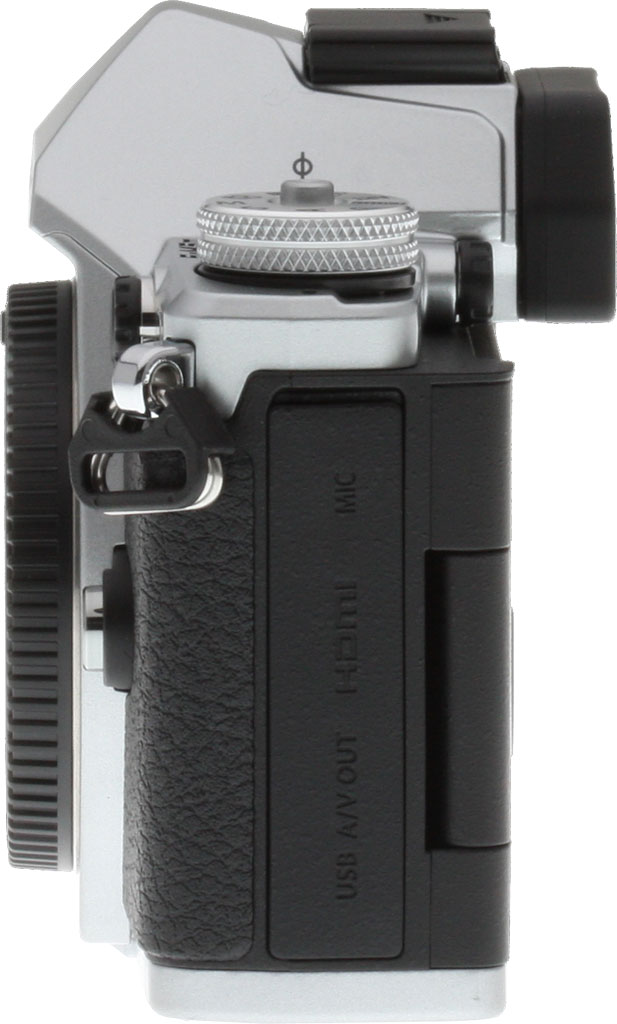 |
The left side, too, is little-changed. As noted previously, the speaker grille that used to sit near the base of the connectivity compartment door has now been relocated to the rear panel. And if you open that compartment door, you'll find one new connector, with the added microphone jack sitting alongside the existing high-definition HDMI and combined USB / standard-definition composite video outputs.
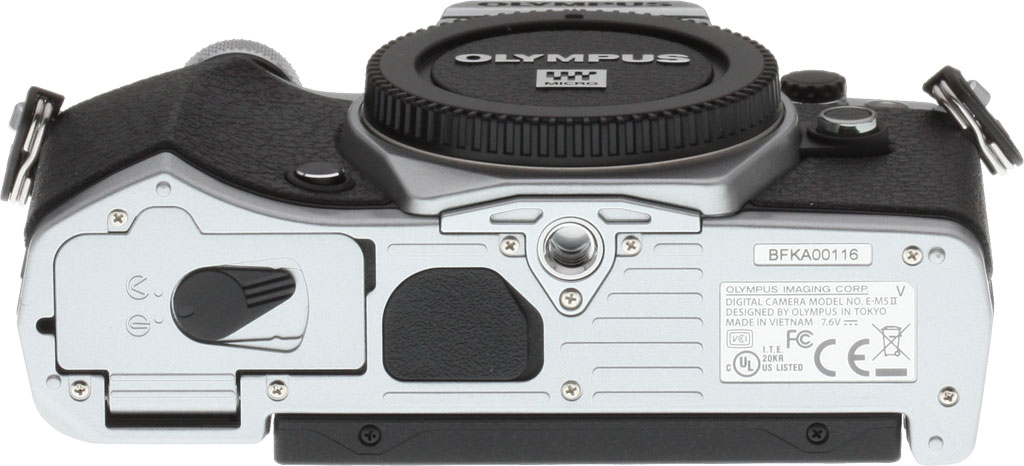 |
Finally, we come to the base of the camera. Again, things are much as they were in the original E-M5, with the most notable change in the E-M5 II being a rehoming of the tripod mount to the optical center of the lens, where previously it sat just right of center. In the process, it has also moved a bit further forward, sitting very close to the front of the camera. Behind and slightly to one side is the rubber plug that covers the accessory grip connector, and as in the earlier camera, the E-M5 II also has a locking battery compartment cover.
Now, let's take a closer look at that new high resolution mode...
Exploring the E-M5 II's "High Resolution" mode
For photographers interested in shooting high resolution imagery for landscapes, architecture or studio product photography, the E-M5 II comes equipped with a special high resolution mode designed to yield a 40 megapixel JPEG image competitive with those available from 36MP full-frame cameras like the Nikon D810 and Sony A7R, and a 64-megapixel RAW file. Really? A camera with a 16-megapixel sensor is going to somehow output 40/64-megapixel files? From our first briefing on this mode, we've been impatiently waiting to put it to the test in our lab!
Before looking at the results (OK -- go peek if you'd like and then come back here) let's take a quick glance at the mechanics of this feat. It's actually pretty clever; one of those things you wonder why it hadn't been done already, once you learn what they're doing. First and foremost, be advised that you must use a tripod in order to take advantage of this new mode, and your subject(s) must be motionless unless you're deliberately aiming for odd motion blur effects.

In High Resolution mode, the E-M5 II fires 8 sequential images across a roughly one-second time period using the electronic shutter, while at the same time using its voice coil-powered sensor-shift image stabilization system to move the sensor very slightly between shots. The net result is 8 images, shifted by sub-pixel amounts from each other, that are then combined into the final super-res image. The end result is either a 40-megapixel JPEG file or that JPEG plus a 64-megapixel ORF file and a 16MP ORI file (not yet supported in common post-processing software). The 64MP ORF file can only be processed with a special Photoshop plug-in, which we haven't seen yet as of this writing.
As you'll see below, one positive side effect of the E-M5 II's "oversampling" of the image is it pretty much completely eliminates moiré. The multiple exposures also significantly reduce image noise at the ISO 1600 limit imposed in this mode. The overall results are flat-out amazing, subject only to the limitation of completely stationary camera and subject.
OK, let's get to the fun part: the comparisons!
[Editor's note: all crops are from in-camera JPEGs with default settings. The E-M5 II images have been slightly down-sampled in order to show a similar size for the comparisons. Clicking on any image will take you to the straight-from-the-camera lab test image. You may also access the RAW files for most of these from each camera's lab samples page.]
 |
Olympus E-M5 II at base ISO
|
 |
Nikon D810 at base ISO
|
 |
Sony A7R at base ISO
|
All three models show incredible detail in the fabric swatches of our test target. The A7R is likely applying a bit more default JPEG sharpening, though the crisp detail works well in these areas. And yet, both full frame 36MP cameras exhibit obvious moiré patterns in the red fabric swatch, where the E-M5 II which also doesn't have an AA filter has none at all. This makes the comparison a lot more intriguing.
|
 |
Olympus E-M5 II at base ISO
|
 |
Nikon D810 at base ISO
|
 |
Sony A7R at base ISO
|
The small lettering and fine lines of the ruler are strikingly clear in the E-M5 II image. Each camera exhibits minor haloing from sharpening, but the clarity from the E-M5 II in most areas is impressive.
|
 |  |
Olympus E-M5 II at base ISO
|
Nikon D810 at base ISO
|
Product photographers will likely find this comparison eye-opening, as the E-M5 II is able to extract a great deal of detail from these peppercorns! (Best pinch your nose before getting too close.)
| |
 |  |
Olympus E-M5 II at base ISO
|
Nikon D810 at base ISO
|
Similar to the peppercorns, the E-M5 II also pulls an amazing amount of detail from these fabric swatches! You can clearly see most all of the thread patterns in the cloth.
| |
 |  |
Olympus E-M5 II at base ISO
|
Nikon D810 at base ISO
|
Similar to the first comparison in this series, both cameras yield images with good overall clarity, with the D810 yielding a bit better contrast and depth. And yet, the E-M5 II displays no trace of the obvious moiré found in the D810 crop in the green part of the label. (Not to pick on the D810; we've seen this moiré with a number of high-resolution cameras.)
| |
Update: Based on a helpful reader request, below are true 1:1 crops to show the E-M5 II at the full 40mp alongside the D810 at 36.3mp:
 |
Olympus E-M5 II at base ISO (full 40mp 1:1 crop)
|
 |
Nikon D810 at base ISO
|
This comparison shows the E-M5 II as delivered from the in-camera JPEG at the full 40mp resolution at a 1:1 crop.
|
In high-resolution mode, the E-M5 limits your ISO choices to a maximum of 1600. Let's take a look at that; the results are again surprising.
 |  |
Olympus E-M5 II at ISO 1600
|
Nikon D810 at ISO 1600
|
Most sub-frame cameras begin to display obvious noise in shadowy areas of our target as ISO climbs to 1600 and higher, but the E-M5 II displays just a trace more here than the D810, which is legendary for its high ISO performance. Its clarity in the mosaic tiles is also just a shade better in some areas from the E-M5 II.
| |
The conclusion from our lab testing is that the Olympus E-M5 II's new high resolution shot mode is truly ground-breaking for applications involving shooting non-moving imagery from a tripod. Landscape photographers, architectural photographers and studio product photographers can rejoice! It's flat-out amazing to see this kind of performance from such a compact, affordable camera. Stay tuned, as we'll take it out into the real world and run it through its paces there as well.
How'd they do that? A little technical aside from Dave Etchells:
Right off the bat, I'm sure everyone is going to be asking how you can in any meaningful sense get a 40-megapixel image out of a 16-megapixel sensor. After all, the image sensor is looking at the world as a grid of 16 million little windows, and any subject detail within each of those windows is averaged together. The image comparisons above are pretty telling, but how can they tease out that kind of detail, if the sensor only has 16 megapixels to begin with? I mean, the subject detail within a given pixel could be half white and half black, or the whole area a medium gray, and the sensor would have no way of knowing the difference.
Well, the camera has no way of knowing what's going on at a sub-pixel level, unless it moves the sensor around a bit and watches what happens. Imagine the case just mentioned, where we have a sharp black/white boundary in the subject (let's make it a vertical edge, for the sake of illustration) which happens to be exactly straddled by a sensor pixel. As noted, that pixel is going to see a middle gray. But what happens if we shifted the sensor a half-pixel left and right? Shift it one way, and the pixel will be all the way on the black side, so it will "see" black. Shift it a half-pixel the other way, and it'll be all the way on the white side, so it will "see" white. Knowing that the three images were grabbed with a half-pixel shift in between, the camera can infer that there must have been an abrupt black/white transition in the subject, centered on the location of the original pixel.
The case of a simple black/white transition is easy to figure out, but what happens when there's all sorts of tonal and color detail changing across the image? How can you sort all that out? It turns out there's some fancy math to do just this; the technique is called deconvolution. It's been in common use for several years now, originally developed for use in reflection seismology, but used extensively in many forms of imaging. NASA in particular has used it to sharpen and correct images from planetary spacecraft and even the Hubble Space Telescope (before it got its corrective "goggles" installed). It's also been used in microscope imaging, and in fact by Olympus themselves. Here's an example from Olympus' own microscopy site, showing the original image on the left, the processed one on the right. It's pretty amazing how much fine detail can be extracted from a fuzzy image!
 |
Here's an example of what deconvolution can do with a microscope image, courtesy Olympus themselves. The image on the left was the original, the one on the right the result of fairly straightforward deconvolution processing.
|
So that explains what's likely going on inside the Olympus OM-D E-M5 II. As someone who was involved with image processing as far back as 1977 or so, it's amazing that this capability can now be built into a compact, portable camera. (The E-M5 II almost certainly has way more processing power than NASA "supercomputers" from the '70s!)
A few sneak-peek gallery images from Bermuda
Our senior editor Mike Tomkins was able to get his hands on an E-M5 II for a few days in Bermuda. Below are a few images from his first day's shooting. (Senior editors get all the fun!)
 |
| Olympus M.Zuiko 14-150mm F4.0-5.6 II / 45mm / f6.3 / 0.3s / ISO 200 |
 |
| Olympus M.Zuiko 40-150mm F2.8 Pro / 40mm / f3.2 / 1/4000s / ISO 200 (slightly cropped) |
 |
| Olympus M.Zuiko 40-150mm F2.8 Pro / 142mm / f2.8 / 1/2000s / ISO 200 |
 |
| Olympus M.Zuiko 40-150mm F2.8 Pro / 82mm / f2.8 / 1/2000s / ISO 200 |
 |
| Olympus M.Zuiko 40-150mm F2.8 Pro / 100mm / f5.6 / 1/1000s / ISO 200 |
No comments:
Post a Comment